The “Big Lifts”, Common Mistakes, and How to Fix Them – Part III – The Deadlift
In the first installment of this three-part series we discussed one of the most widely used and accepted exercises in all of performance training, the Squat, some of the common flaws seen by novice trainees when performing it, and a couple of solutions for those faults.
Part two addressed the same themes, except this time with another prevalent and popular exercise, the Bench Press. Today we will spend some time looking at one final exercise to wrap up this series – the Deadlift.
As stated in Part I of this series, and now said again as a reminder, the exercises chosen for discussion (the Squat, Bench Press, and Deadlift) were purposely chosen for a couple of reasons, as were the common faults seen in those exercises:
- These are some of the most widely incorporated exercises in all of strength and conditioning, ones that have thus far withstood the test of time. They are – or should I say, they or their variations are – in nearly every training program you will come across. Whether it is a Front Squat, Back Squat, Goblet Squat or Pistol Squat – you will probably see the Squat performed in some capacity in every weight room or facility around the world. The same can be said about the Deadlift (whether it be the Trap Bar, Sumo, Standard, Rack Pull, Clean Pull, RDL, etc.) and the Bench Press (whether it be Dumbbell, Barbell, Swiss Bar, etc.). Whether or not you, personally agree with a certain exercise or variation is beside the point; these exercises are being used by young athletes everywhere, thus they should be optimized for safety and effectiveness.
- The Squat, Bench Press, and Deadlift (and many of their variations) are a major part of the Driveline-U program, which I consult for, and my own Strength & Conditioning Program at the High School level. Therefore, I see these exercises performed by novice trainees on a daily basis. I also see trends when it comes to common technique faults. I am basing my discussion on this, not necessarily what happens in other circumstances, or what happens in your weight room.
With the above disclaimer in mind, let’s discuss the Deadlift, the major common faults that I see when novice athletes perform it, and some solutions to rectify the issue.
The Deadlift
The Deadlift has the potential to be one of the greatest exercises implemented in a program for nearly any sport. If the sport or activity requires lower body strength and power, especially from the posterior chain (as most do), then the Deadlift can be a major key to performance enhancement.
But, for all of its potential rewards, it does carry some significant inherent risks. If performed improperly or carelessly, each repetition of the Deadlift can bring a person one step closer to serious back pain and injury. Thus, correcting any faults seen in technique must be priority number one when implementing the Deadlift.
Lacking a Consistent Set-Up
One common theme that seems to resonate with a novice trainee who has no prior experience with the Deadlift, or has limited experience, is the lack of a set up.
Now, the situation that I have at the high school level is different than with Driveline-U. At DeLand High School I am able to implement a teaching progression in order to take my athletes from zero Deadlift experience (or bad Deadlift experience) and work them directly into the technique for which I am looking. That is why I typically start by training the Hip Hinge (unloaded) first, then spend 9 weeks progressively loading and training the RDL before ever teaching the Deadlift (more below).
With Driveline-U, the athlete (much like anyone reading this) is usually Deadlifting on their own prior to coming into the program, thus their form will vary. Generally, these athletes walk up to the bar, hardly address it whatsoever before squatting down (or bending down at the lumbar spine) to grab the bar. They then will spend 5-10 seconds or more preparing themselves in the bottom while their arms and body loosely hang there. Then, they will contort their neck into extension to look at the ceiling, and pull with all of their might, sometimes snapping their body like a toy as they go from zero to full-tension in a split second.
Thus, my first recommendation for nearly all of those Driveline-U participants is to standardize their set-up for a more consistent and safer pull.
Here is the standardized set-up I suggest they begin with:
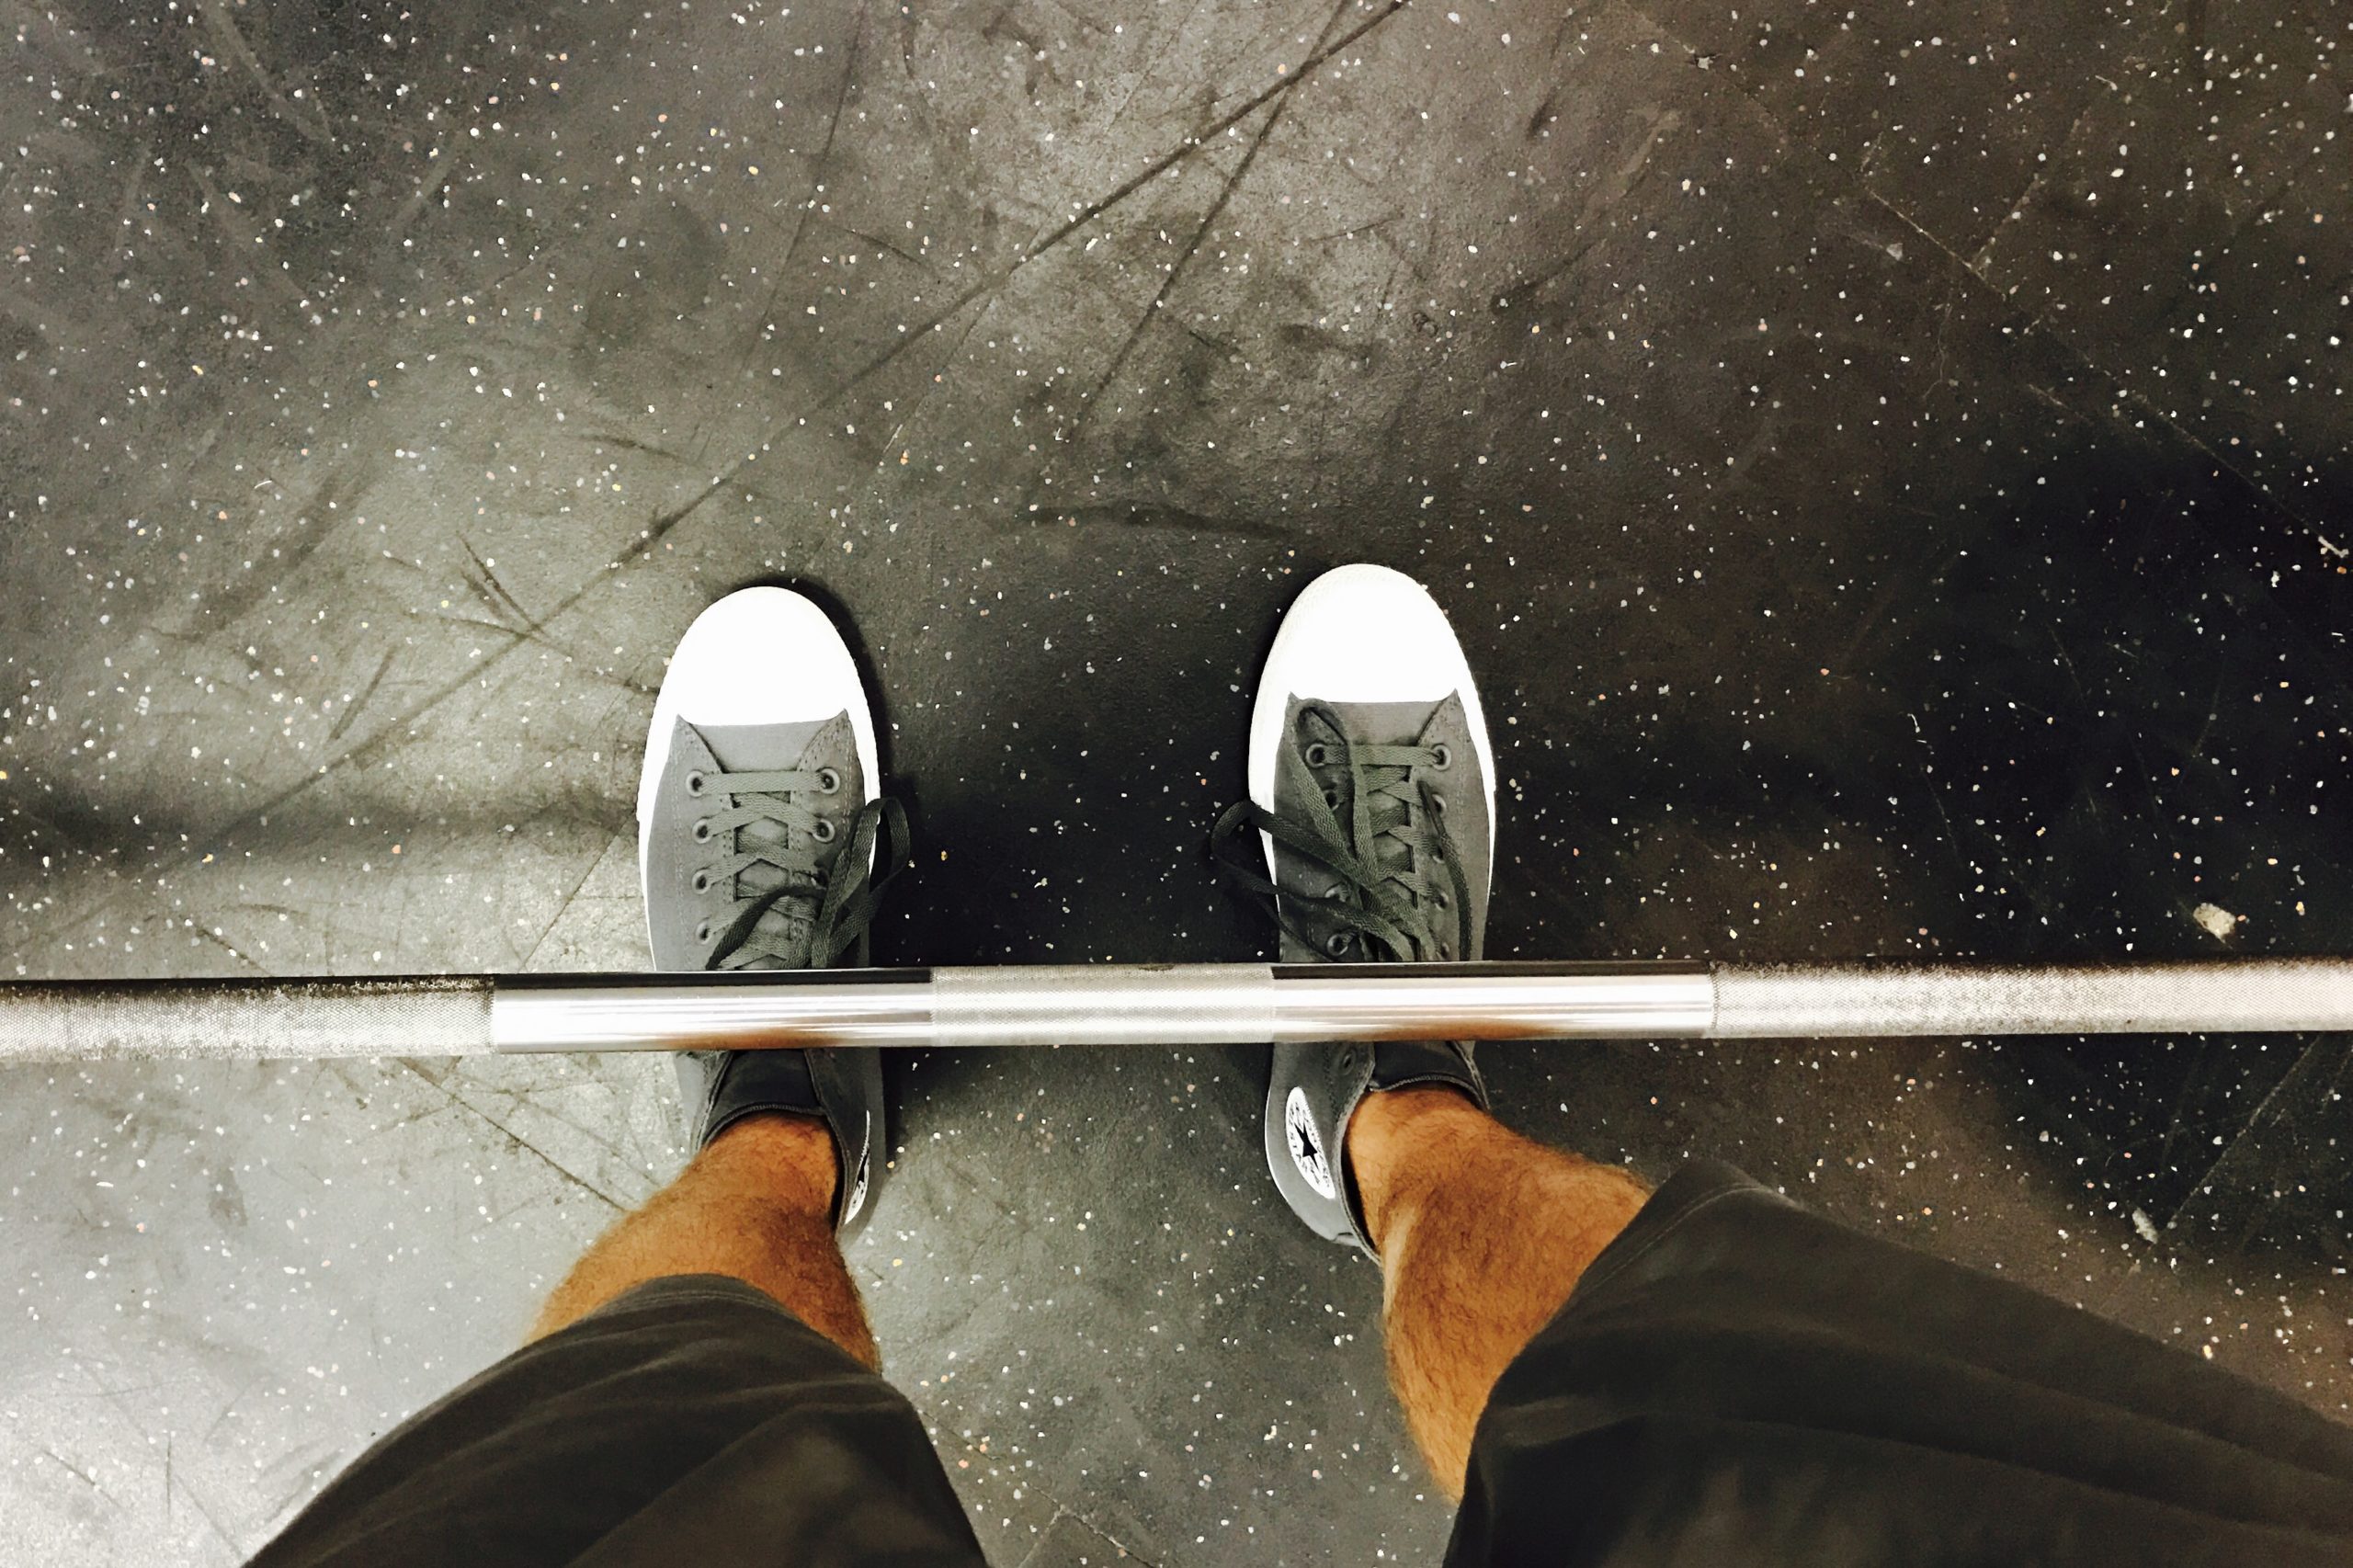
1. Address the Bar: walk up to the bar with your feet roughly hip width, and with your feet under the bar so that, when standing and looking down), the bar blocks the view of the knot of your shoe laces. (This means the bar will not start against the shins when standing)
2. Hip Hinge Down to the Bar: this is one reason why I personally teach the RDL first. I want the athlete to know how to reach for the bar (or any object on the floor) without necessarily having to squat to do so, and certainly without bending at the lumbar spine. By displacing the hips back and hip hinging to the bar we accomplish 3 things:
A) We tension the hamstrings prior to the start (this can come in handy down the road if we want to take advantage of the Strength-Shortening Cycle)
B) We set the hips back and the shoulders over the bar, rather than squatting to the bar with our shoulders behind the bar and hips underneath us (there’s a reason why it isn’t called the Bottom-Loaded Squat…)
C) We are now ready to get into a favorable “set position”
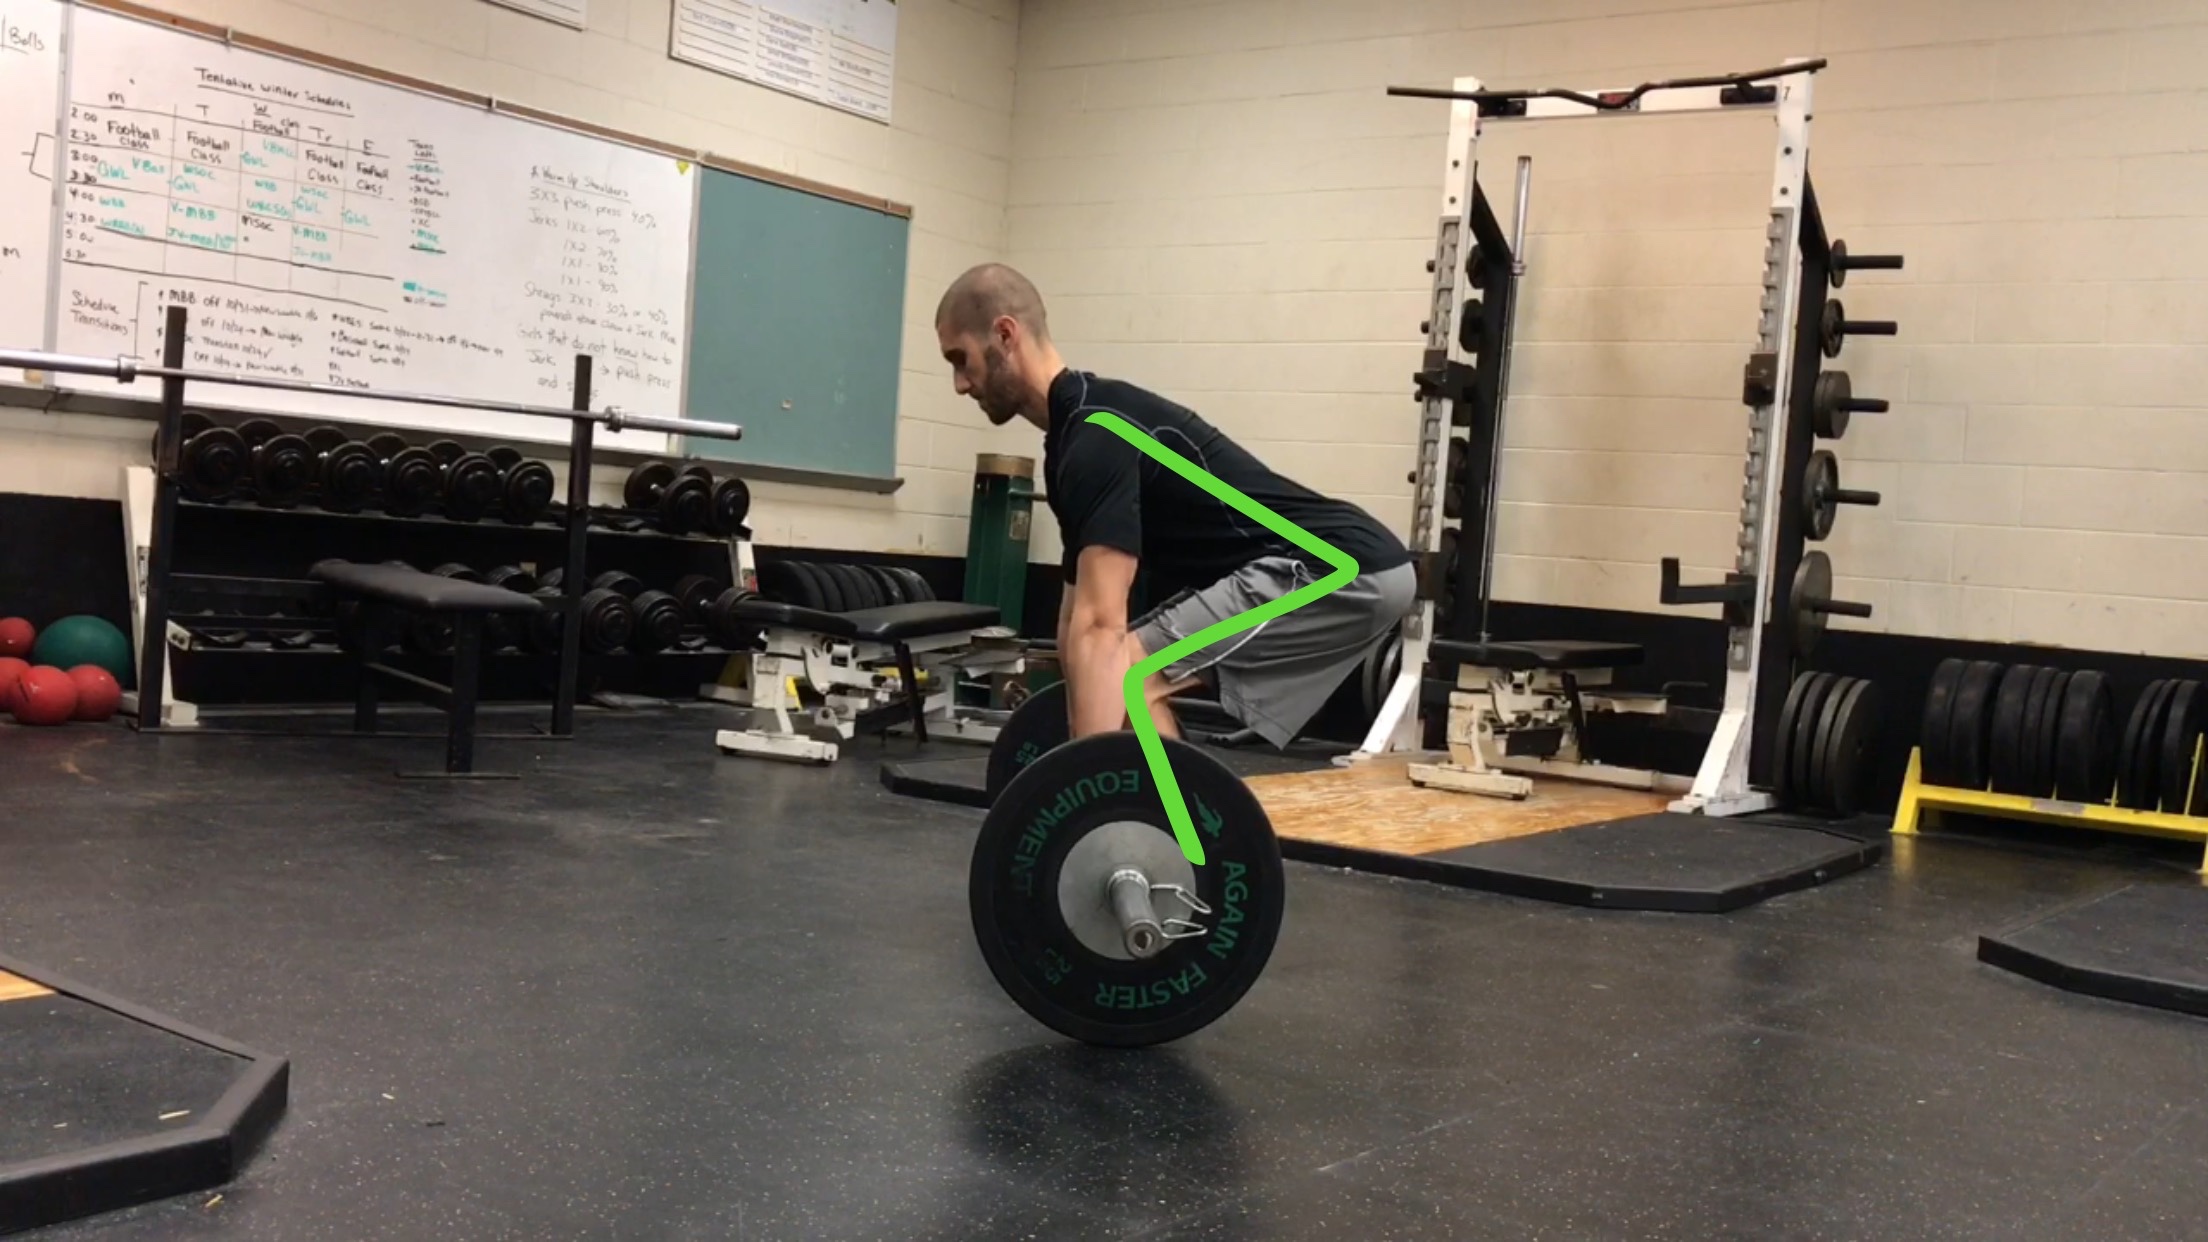
3. Get Set by Pulling Your Hips Down and Chest Up: I’ve heard the cue, “wedge yourself down to the bar“, and I like that one. But, generally I will tell my athletes to Pull themselves down to the bar so that they simultaneously lower their hips slightly, raise their chest (and flatten out their spine), while also pre-tensioning their lats and taking some slack out of the bar. By pulling themselves down, the have to engage the upper body, which is vital for the Deadlift. Also, this gives them a chance to find their ideal hip-height. I am not one to dictate an exact height, but I have my athletes strive to achieve the following:
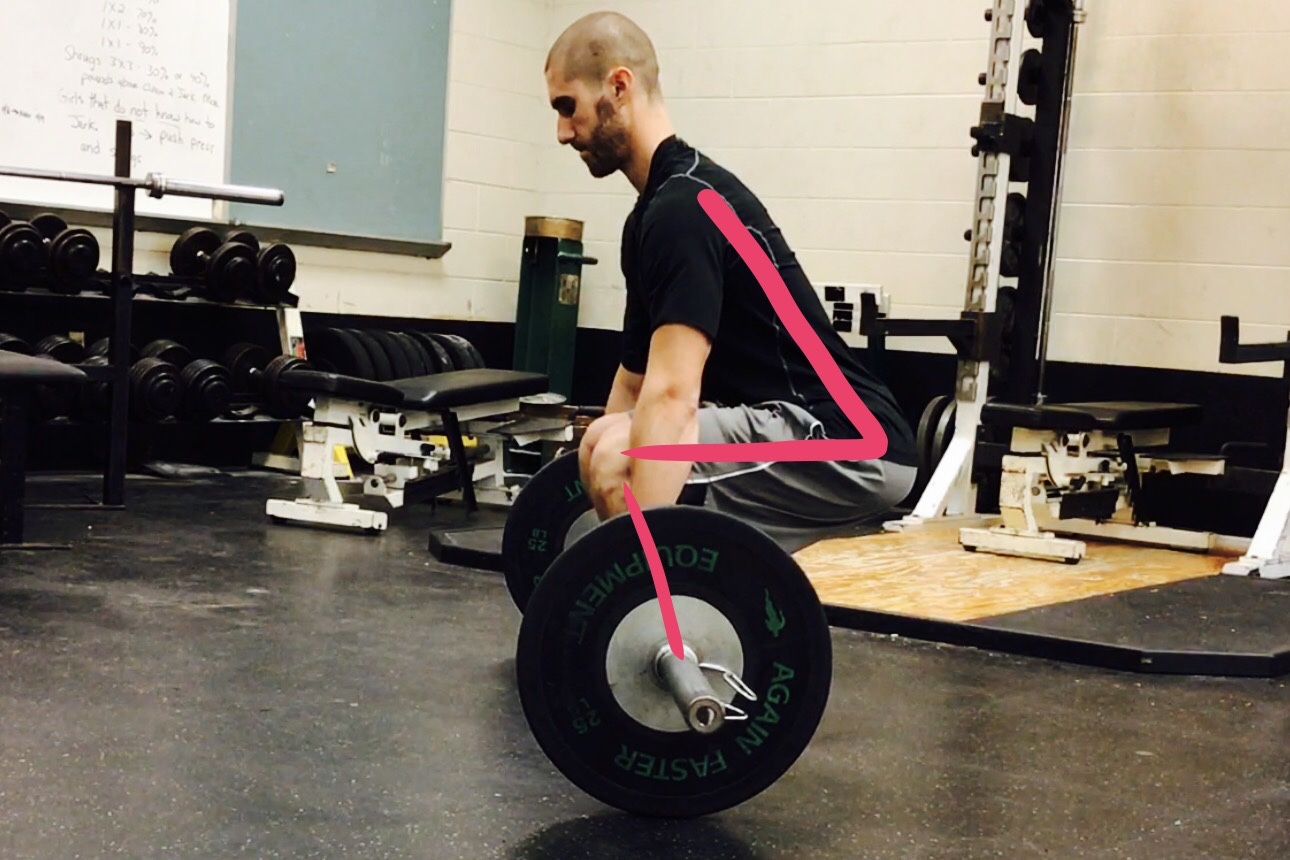
Keep the shoulders above the hips and the hips above the knees.
This zig-zag shape does allow for some wiggle room when it comes to the height of the hips, depending on what is comfortable given the athlete’s levers, but it is sure to keep them away from a squat (hips parallel to the knees) or a risky bend (hips parallel to the shoulders).
Hip height during the set up can make or break a Deadlift.
Hips parallel to the knees, making it more of a squatting pattern and putting the shoulders behind the bar
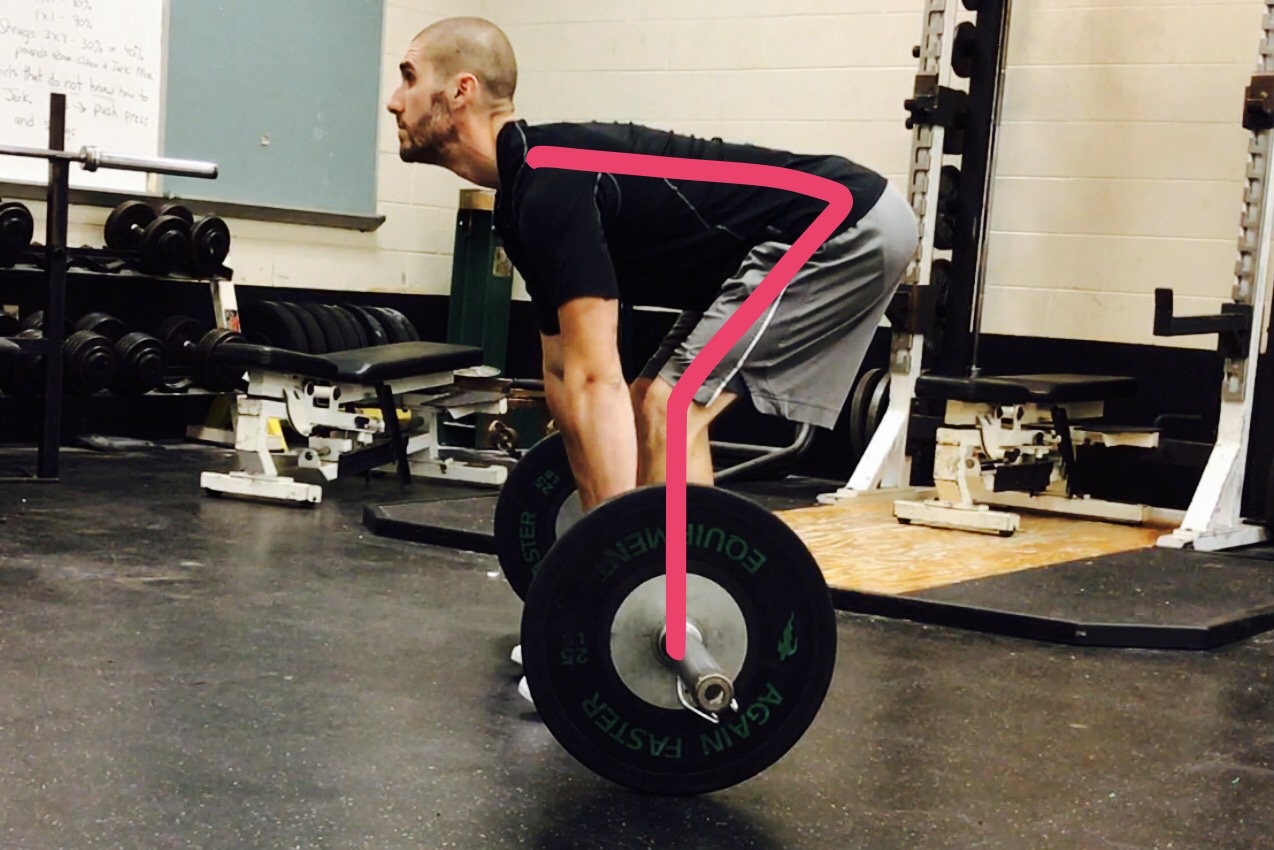
Hips parallel to the shoulders, making for a precarious movement pattern under load
Shoulders above hips, hips above knees.
4. Final Preparation – Take Some “Slack Out of the Bar”, Breathe, Tuck Your Chin, Go: Down the road, the athlete can decide if they want to use the Stretch-Shortening Cycle (i.e. the Stretch Reflex) in their set-up – which will require the set-up to be much faster (thus, it is an advanced method) – or if they’d rather take a little longer addressing the bar, and take “slack” out of the bar as well.
For beginners, I try to teach the latter, as it promotes full-body tension and a deliberate set-up (when beginners will generally want to rush through it). When the bar is loaded, it will tend to have a little bit of “slack” (meaning the bar will actually move upward first without the weight) which can often be heard as a clicking sound when the pull is initiated. The bar may also bend slightly upon first pull, before the weights actually levitate at all.
This is why “taking the slack out of the bar” is important – an athlete can essentially eliminate this inconsistent load and speed curve off of the floor by getting rid of it early with some tensioning.
In other words, if the bar is loaded up to 225 lbs, the athlete should think about pulling just under 225 lbs in their set up (maybe 200 lbs) for just a second or two. Since ~200 lbs is less than 225 lbs, the bar will not move off the ground, but the “slack” will have been removed.
During these couple of seconds the athlete should also finalize their set up with a giant breath in to solidify abdominal pressure, and tuck their chin down for a neutral cervical spine. Then they will pull!
No matter the load or the repetitions, the athlete can be confident in the safety and effectiveness of their Deadlift given the consistent set-up.
***
To briefly reiterate: the goal of this 3-part series was not to discuss the legitimacy or efficacy of using any one of the “Big Three” exercises – the Squat, Bench Press, and Deadlift – or their variations for the baseball pitcher. Nor was it to dictate that they must be implemented, and that they must be implemented in this manner.
Rather, the goal of this series was to acknowledge that the “Big Three” are appropriately named this for a reason – they are widely used and widely effective – and thus can be expected to be getting usage in weight rooms across the country, probably as we speak. Thus, we should discuss some of the common faults seen when novice trainees begin implementing these exercises and their variations, and propose ways to correct them.
This series is not an all-encompassing guide to any of these complex exercises, nor did it address all common flaws seen when athletes perform them. Therefore, if you have any additional questions please feel free to drop them in the comments below, or email me directly at [email protected]
You can read the last part of the series below
Part IV: Pulling Exercises
Want to learn more about strength training as it relates to being a better baseball pitcher? Read all of our articles relating to strength here.
Comment section