How to Throw a Curveball
Welcome to Part 4 of our “How to Throw” series. In this post, we’ll be discussing curveballs, one of the most popular breaking pitches. The following information will serve as a guide and provide details helping you to create a quality curveball of your own.

Overview of a Curveball
A curveball is a breaking pitch that possesses strong downwards movement. While fastballs are thrown with backspin to create lift, a curve is customarily thrown with topspin to induce drop. Topspin is what causes a baseball to move downwards (aided by the force of gravity) as it approaches home plate.
Typically, this pitch type is thrown with a similar release point as a fastball, albeit with slightly less extension. A curveball will also have a significantly different movement profile relative to a player’s FB, as most pitchers will throw it 10 to 15 mph slower than their heater, with about 25 inches of vertical separation. The differences between the two pitches help deceive hitters, leaving them wondering what exactly happened.
How to Grip a Curveball
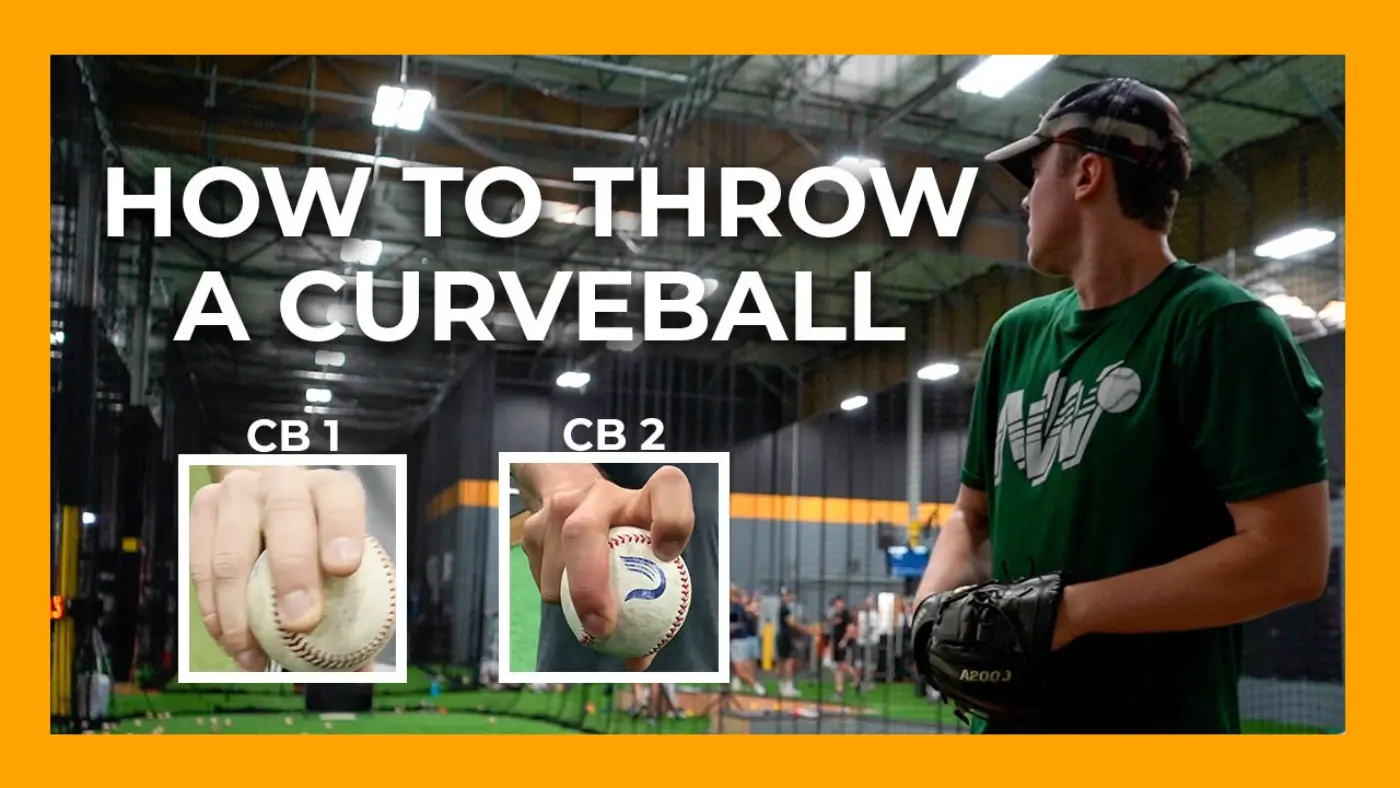
If you are familiar with this pitch, you’ve likely heard of the “12-6” or “knuckle” curve. The varying names give the correct impression that there can be multiple ways to throw a curveball. At Driveline, we’re able to account for differing grips and ball orientations using our grip tracker database.
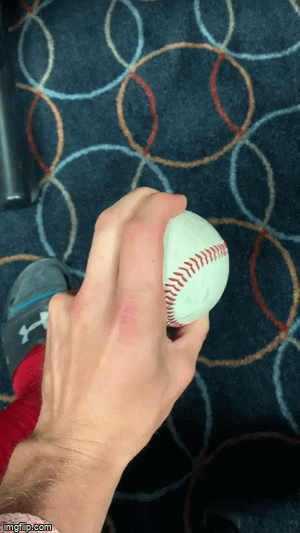
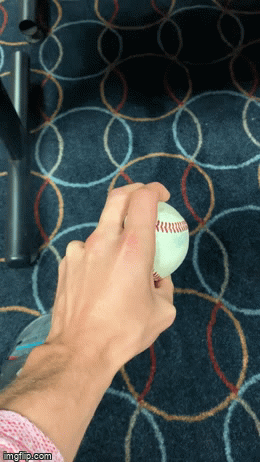
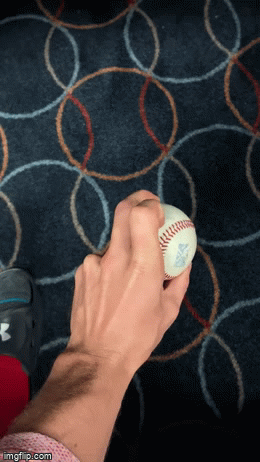
The most common grip used by our athletes is “CB 1.” A standard grip to many, the middle and index fingers are placed strategically onto the ball. The middle finger leverages the seams, while the index is placed on the leather. These two fingers are used side by side to induce maximum amounts of force in order to generate spin.
It’s important to remember that to create greater movement, we want to produce as much spin as possible. Doing so will allow us to craft an effective curveball.
The thumb is positioned on the opposite side of the ball, leveraging a seam as well. One thing to note is that the ball is tucked into the palm. In other words, there is little to no space between the palm (or the bottom of the finger) and the ball.
Having the ball tucked into the hand enables the pitcher to impart greater pressure onto the ball, which is used to generate velocity and spin.
The knuckle of the ring finger is placed on the side of the ball in order to help maintain control, while the pinky finger is completely off. After you’ve positioned your fingers comfortably, you should hold the ball with a good amount of pressure between your thumb, index, and middle fingers.
How to Throw a Curveball
A curveball is uniquely released compared to fastballs or changeups. Take a look at the example Edgertronic footage below.
Notice how the pitcher’s hand is slightly off to the side. This enables the fingers to get in front of the ball and pull down on the pitch to produce topspin and eventually the desired top-down movement.

One of the cues we recommend is to “yank” the ball down with your middle finger, or to “throw the ball with the back of your hand.” The pitch should feel as if it “shoots” out of the hand upon release.
Depending on your success, the pitch should follow a similar trajectory as your fastball and drop during the last few feet. If you don’t have access to high-speed video, you can pay attention to the type of spin and movement the ball has during catch play or bullpens. It might take time to develop a feel for this pitch, but further practicing and using different cues will help in your development.
Analyzing Curveball Movement
When you’re ready to throw on a Rapsodo device to measure your progress, you can track your pitch’s movement profile using the horizontal and vertical break plot. This graph shows us that curveballs, which are highlighted in yellow, would fall lower on the graph with increased negative vertical movement.
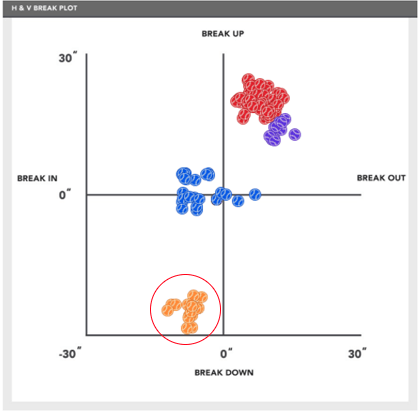
It is important to note that the break on a pitcher’s curveball will usually mirror his arm slot. A higher release point will lead to a more top-down movement profile, similar to the example above. This is how the term “12-6” is derived.
Conversely, the lower a pitcher’s arm slot, the more we’d expect a curveball to possess some horizontal movement. A curve that maintains close to equal movement horizontally and vertically can be known as a “slurve.”
There is no type of curveball that vastly outperforms another.
Some curves are thrown faster and maintain tighter or smaller break profiles, while others may possess large amounts of movement with lower velocities. However, the latter may give hitters more time to react.
To determine which curveball profile suits you, understand what type of pitch profile you’re able to create and what will be the most effective within your arsenal.
Additional Grips and Cues
Below we have listed additional grips and cues. You’ll notice about five other curveball grip types that are common amongst our athletes. Each grip will vary between either seam orientation or index finger usage.
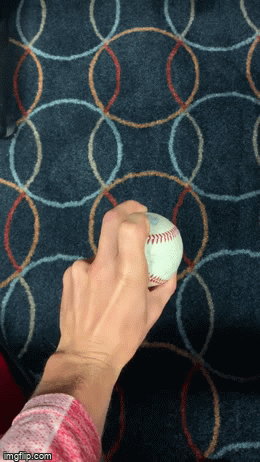
The main difference between CB 1 and CB 2 is the seam position. While both the index and middle fingers are placed onto the ball, their location differs. In CB 2, the horseshoe is leveraged along with the inner seams, which may provide greater feel and results for a given athlete.
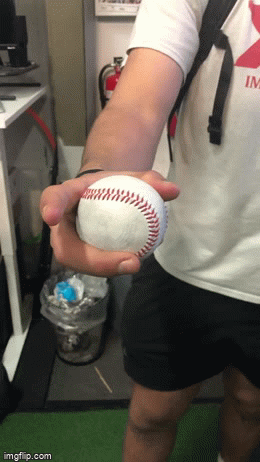
Grips 3 and 4 share commonalities with the first two grips in regard to placement on the ball, but the main distinguishing factor is the use of the index finger. This type of grip starts to resemble a “knuckle-curve” or “spiked curve.”
In those examples, by digging the tip of the finger into the ball the pitch becomes “spiked.” The amount of pressure imparted by the fingertip will vary between athletes based on comfort. Although not shown, athletes can also place the knuckle of their index finger onto the ball as opposed to the fingertip.
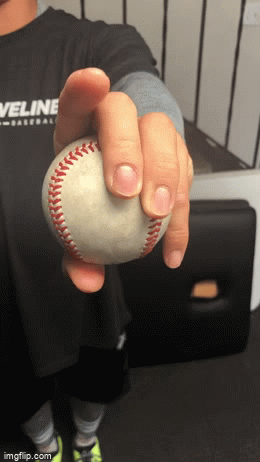
Our last two grips, CB 5 and CB 6, feature the index finger completely off the ball. Some of our athletes have found this helpful as it increases their feel and success of the pitch. Since most of the work imparting spin is done by the middle finger, the index finger gets out of the way and allows the middle to maximize its force onto the ball.
Additional cues: “Get in front of the ball”, “Spin the ball with your middle finger”, “Throw with the back of your hand”
“Horseshoe” CB 2
“Standard Spike” CB 3
“Horseshoe Spike” CB 4
“Standard w/ Index Off” CB 5
“Horseshoe w/ Index Off” CB 6
Summary
There are many variables to consider in your pursuit of a curveball. Some factors that may come into play, such as comfort or finger length, can affect your progression. Therefore, it’s important to explore different grips in order to achieve the pitch you envision.
Read How to Throw a Sinker or Two-Seam Fastball
Read How to Throw a Four-Seam Fastball
Comment section