What is the Isometric Seal Row?
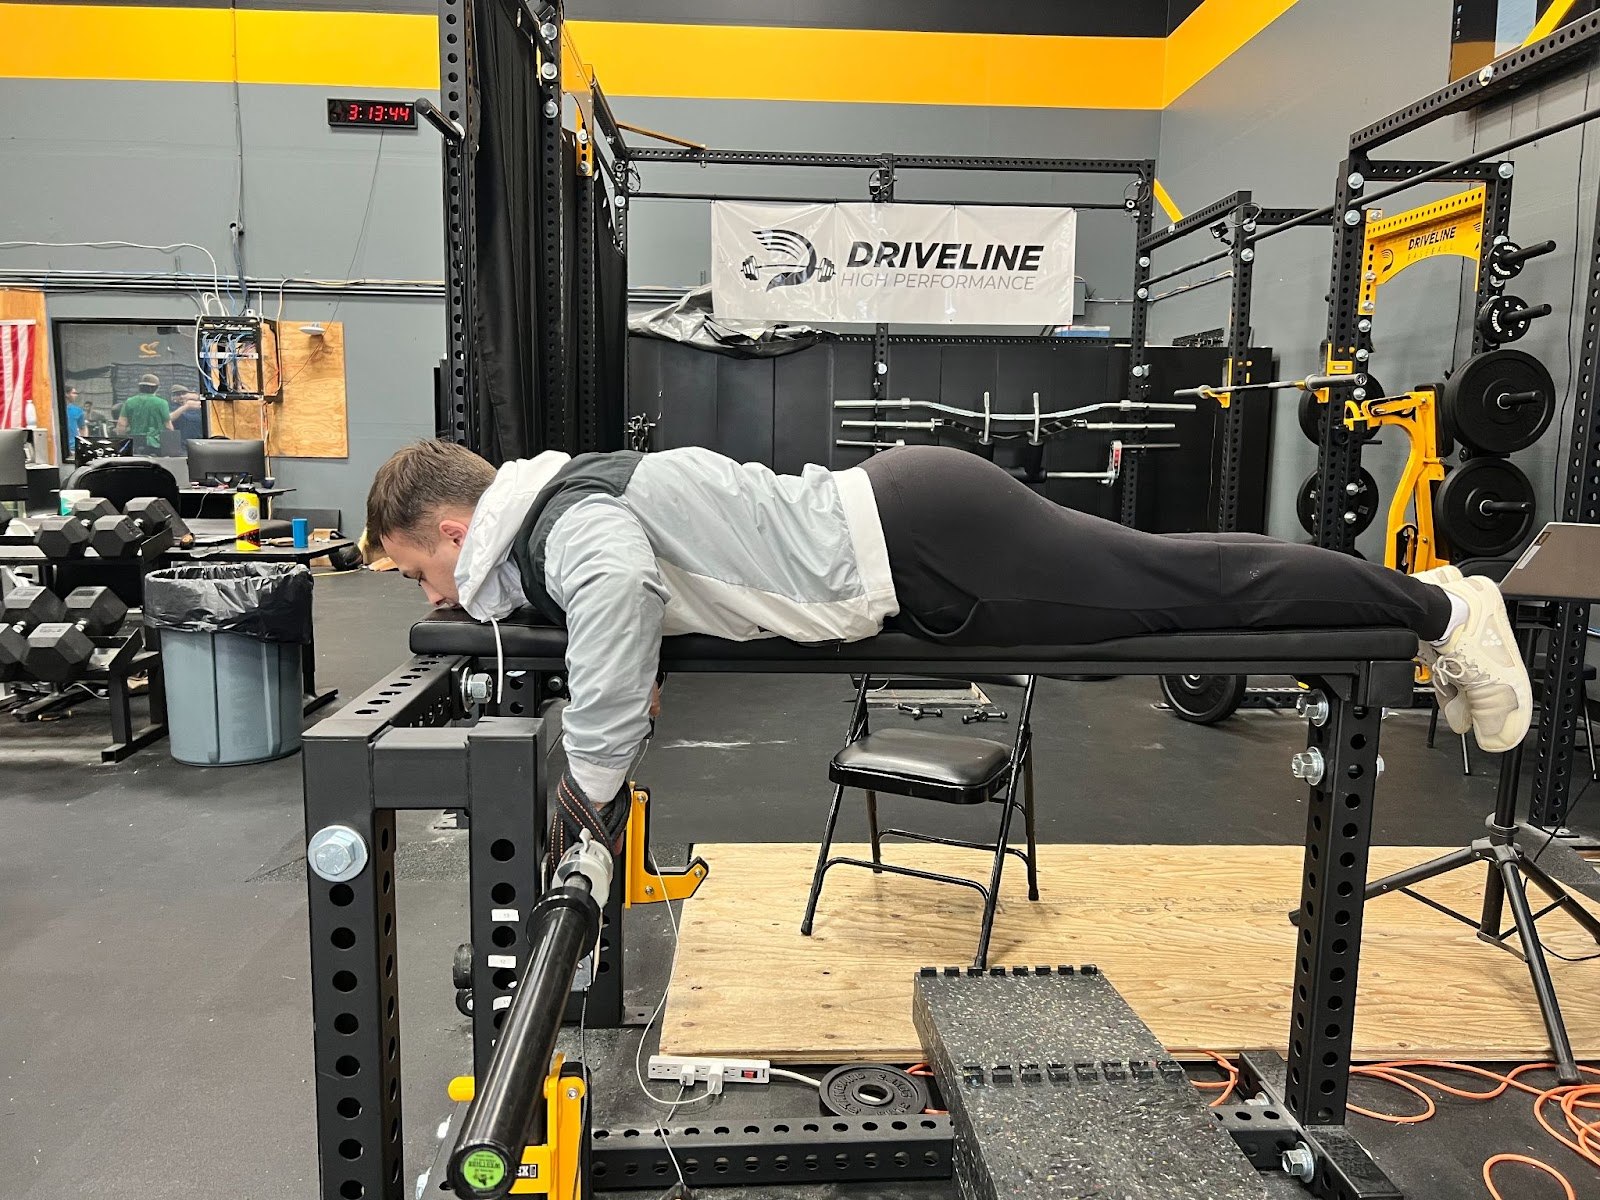
The Isometric Seal Row (ISR) is a multi-joint isometric test athletes perform lying prone on an elevated bench with a barbell locked into place below them, as pictured below. We use this test in our assessment as a measure of upper-body absolute strength. It is unique in our assessment because the test uses ForceHooks to measure output rather than the dual force plate setup in our lower-body assessments.
(To read about the rest of our assessment series, check out our assessment overview blog, and to learn more about how we tested ForceHooks read our validation blog.)
Why we use the ISR
Multi-joint isometric tests (MJITs) show numerous benefits over other maximal force testing methods, for our specific needs and athlete population. Among these benefits, the main strengths are lower injury risk and less technical lifting skill required to execute the test.
When we were deciding what to include in our strength assessment, we compared the ISR to other maximal isometric testing options, such as an isometric bench press. We wanted a test that fit several criteria. First, the test needed to be easily standardizable with reliable data so that results can be compared across all athletes that assess.
Next, the test needed to fit within our athletes’ normal assessment week, which typically includes our full strength assessment as well as at least one high intent throwing session. Among other criteria, we wanted a test that utilized a high output pull or press so that we would be able to get as close as possible to each athlete’s maximal upper-body force production in one test.
The final criteria narrowed our search to a horizontal row or press, and while both a prone/seal row and a bench/floor press fit the first criteria, the press failed the second criteria (test subjects reported significantly more soreness from the pressing movements than from the row).
Our Seal Row Testing Protocol
1. Athlete lays on seal row bench face down, with the barbell directly below the bottom of their chest.
2. To determine the bar height, the athlete makes a 90° angle at the elbow while gripping the barbell with hands directly below the elbows.
3. Trainer plays an audible buzzer countdown with three short beeps and one three-second beep signifying the start and duration of the pull. This lets the athlete know what to expect during the trials. This is the same protocol as our IMTP.
4. The athlete is instructed to:
a. “Grip the barbell, but do not create any tension until the timer reaches go.”
b. “On the count of the buzzer, pull yourself to the bar as quickly and with as much force as possible, as if you are trying to pull yourself through the bench.”
5. Have the athlete perform two warmup/familiarization trials, first at 60% RPE and then 75% RPE.
6. The athlete performs three trials at maximum effort with one-minute rest between (any trials showing an unsteady baseline, countermovement at the onset of the rep, or peak force achieved at the very end of the effort indicating a yanking motion are discarded).
7. If the third trial is more than 100N higher than the first or second trial, the athlete performs a fourth trial.
While familiarization benefits are minimal in an MJIT, we still want multiple reps before any max effort trials so that the athlete can get comfortable with the test as well as familiar with the protocols and buzzer. The reps at 60 and 75% appear to be effective for familiarization and preparation, as most athletes see their best performance in the first two maximal trials.
Why do we do it this way?
In any standardized test, controlling as many variables outside of the variable that’s being tested is essential to ensure trustworthy data. This is why we measure joint angles to determine bar height for each athlete, as we don’t want athletes of different limb lengths to have any advantages or disadvantages. We chose 90° after testing multiple elbow angles because athletes reported little to no soreness at that angle, likely due to the lower output than higher joint angles, and it was also quickly standardizable.
There is some degree of error in the measurement due to the difference between an athlete’s positioning between slack (measuring), partially tense (warm-up/familiarization reps), and fully tense (maximal reps). If an athlete’s angle appears significantly changed during the warm-up reps we can re-measure, but once they are at 100% bar height should remain constant.
While familiarization benefits are minimal in an MJIT, we still want multiple reps before any max effort trials so that the athlete can get comfortable with the test as well as familiar with the protocols and buzzer. The reps at 60 and 75% appear to be effective for familiarization and preparation, as most athletes see their best performance in the first two maximal trials.
What Seal Row Metrics Matter
In the ISR we primarily look at two metrics: Peak Force (PF) and Relative Peak Force (RPF). If you recall from the IMTP, we typically use Net Peak Force as our measure of absolute strength, but in this case, there is no bodyweight on the dynamometer so Net Peak Force=Peak Force. Peak Force from the ISR gives us a metric for absolute upper-body strength, essentially a picture of how much force the athlete can possibly exert using their (posterior) upper body.
Dividing the PF by the athlete’s bodyweight provides RPF, and gives additional insight by telling us whether an athlete is strong for their size. As with RPF in the IMTP, this number is especially important for athletes who have an emphasis on their body weight in their current training phase. For example, an athlete looking to add muscle mass would want to see their RPF maintain or even increase as they gain weight, indicating that the newfound mass is actually helping them exert more force. On the opposite side, an athlete looking to lose weight would want to see at least a proportional increase in their RPF, indicating that the lost weight didn’t cost them strength.
Given that the bar is fixed on both ends to a ForceHook, we are collecting data from both hooks to eventually analyze athlete upper body asymmetries. At this point, a greater sample size and a thorough analysis are both necessary to determine what constitutes a significant or actionable asymmetry.
The big takeaway
The ISR using ForceHooks gives us an upper-body maximal strength test that can be easily implemented with athletes of all training ages. The test shows a moderate positive correlation to athlete skill results (pitch speed and bat speed), and will soon be incorporated into a new version of our predicted velocity metric.
By Connor White, High Performance
Comment section